You’ve installed the Test System and yet, it doesn’t seem to run or you seem to be rerunning the installation program over and over. What should you do?
Step #1 – Find the Test System Shortcut
If this is the first time you’ve installed the Test System then you most likely don’t have a shortcut set up properly.
Go to your desktop and see if you can find the following icon:

If you can find the icon, double-click and it should startup properly. If you can’t find it then you probably don’t have a shortcut yet. That means you need to create it! It’s easy – don’t sweat it.
Step #2 – Create the Shortcut
You’ll need to find the installation folder of the Test System. That can usually be found in the C drive, \TestApps\TLIMS Test System folder:
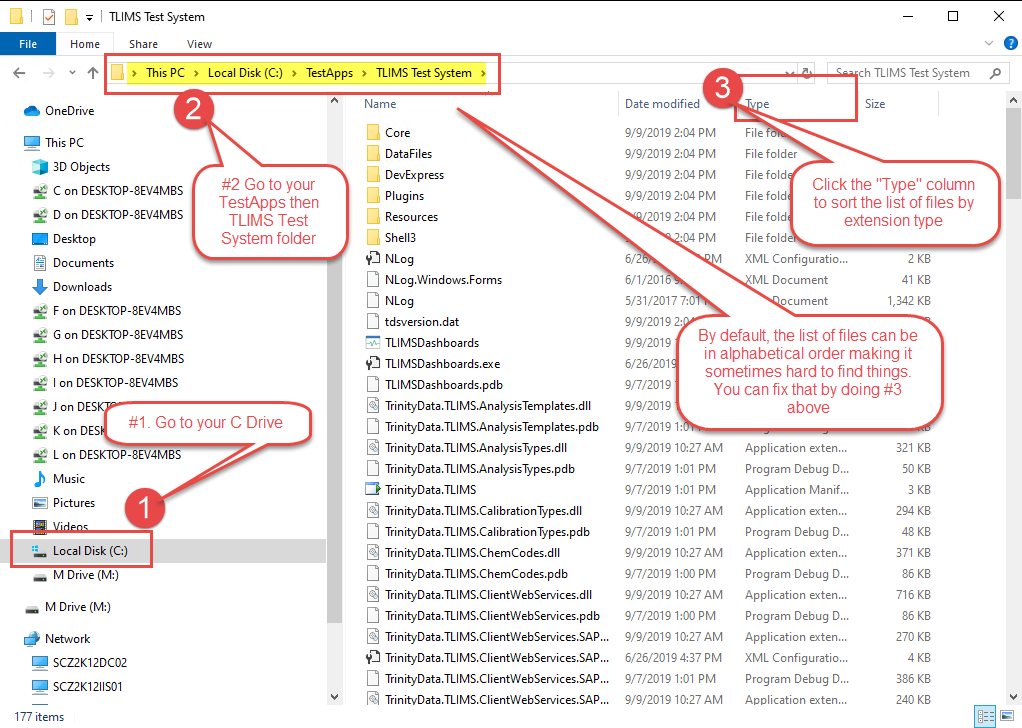
You’re trying to locate the executable file for the TLIMS system. With this view, you can sort the list of files by Type so that you can find the executable file:
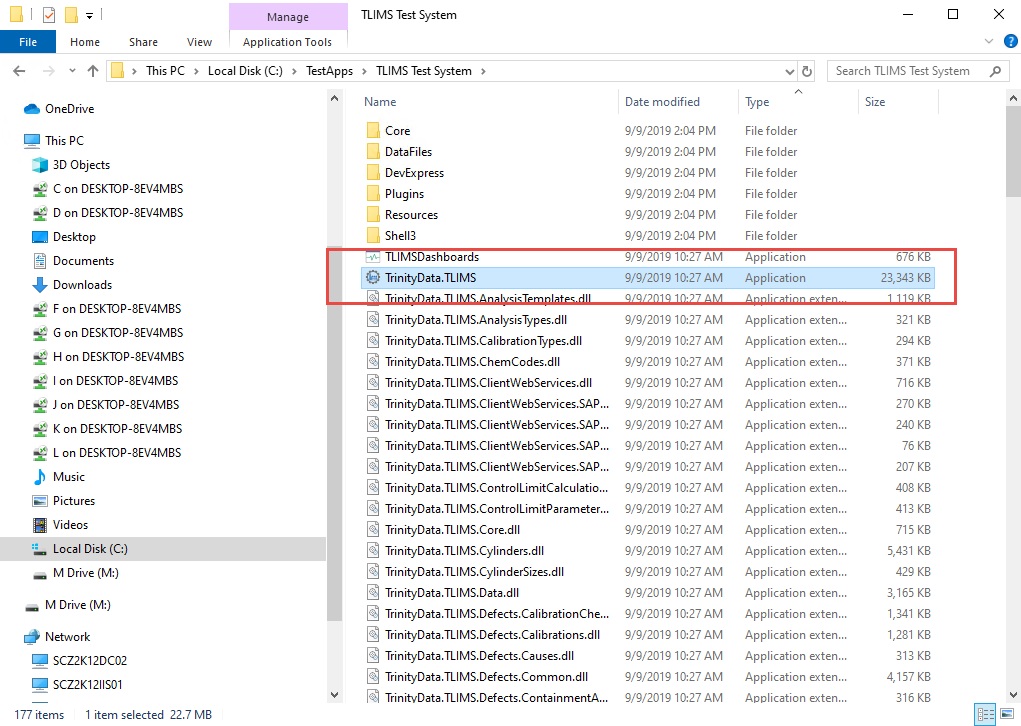
Now that the files are sorted, you should be able to locate the TrinityData.TLIMS Application file. Right click on the file to bring up the context sensitive menu.
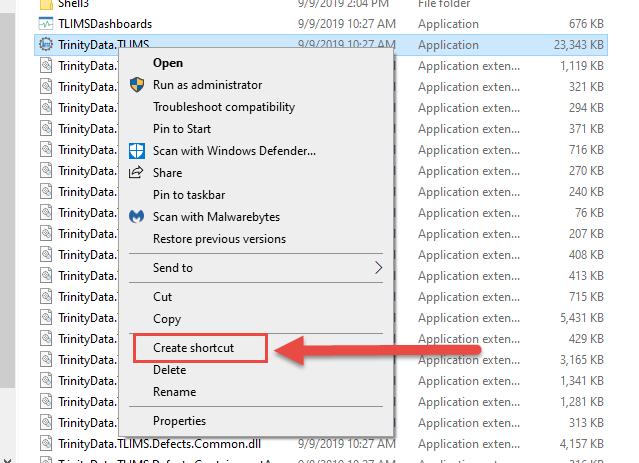
When you click the Create Shortcut option, it will create a new shortcut file for you.
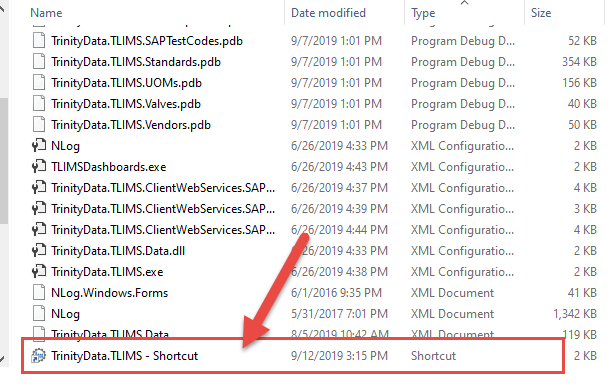
You’ll need to edit the properties of the shortcut because we need to fix the command line to properly access the TLIMS Test System. So, right click on the shortcut file and select properties.
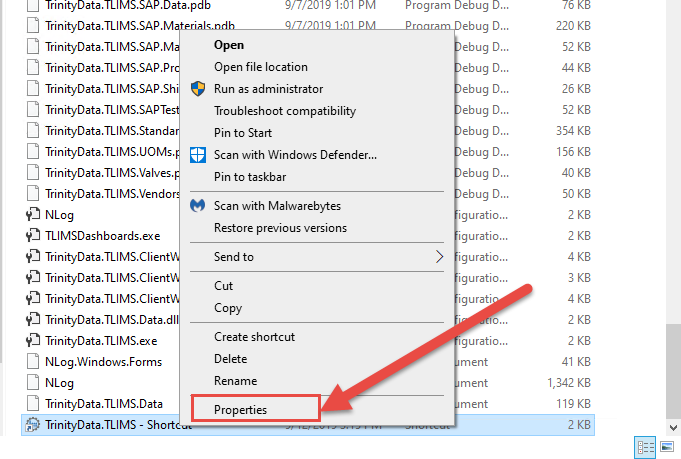
The shortcut properties box will pop up and you can now select the “target” field (while the “start in field can remain the same).
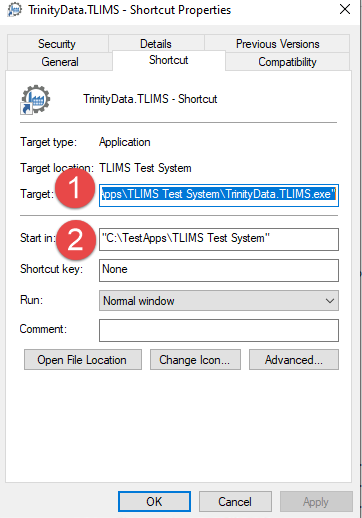
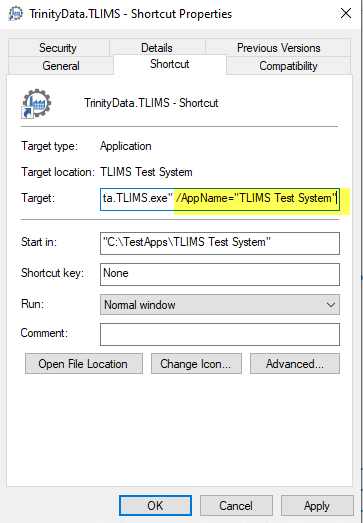
Copy the above text and insert it into the “target” field. Ensure that it is the exact command line above otherwise, your shortcut will not work.
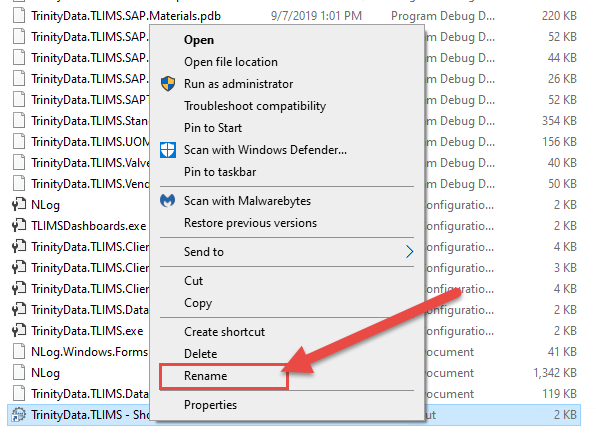
You should rename the shortcut file, identifying it as a shortcut so that it is easy to find and recognize. To do that you’ll need to right-click again on the shortcut and select the Rename off of the context menu:

Step #3 – Test it out!
Double-click the new shortcut. It should pull up the TLIMS Test System. You should see the normal TLIMS sign-on screen but with different connections to the QA servers. If not, you can send an email to support to create a ticket.
Step #4 – Copy to the Desktop
To complete the process, you should make a copy of this shortcut and paste it onto your desktop. It’s pretty simple.
- Right click on the shortcut
- Click copy
- Go to your desktop
- Right click on the empty desktop area
- Click the paste
Done!
